Using Page Builder
When creating a new page or post, use the Page Builder feature to easily design and customize your exhibits, pages, or posts. Page Builder allows the use of Toolkit Shortcodes to embed maps, visualizations, and objects from Northeastern’s Digital Repository Service (DRS).
Accessing Page Builder
Select “Add a New Page” or “Add a New Post” from the Dashboard sidebar.
Alternatively, Edit an existing Page or Post by clicking on the desired option from the Pages or Posts menus.
Next, select the “Page Builder” tab on the far-right, next to the “Text” tab, above the text box.
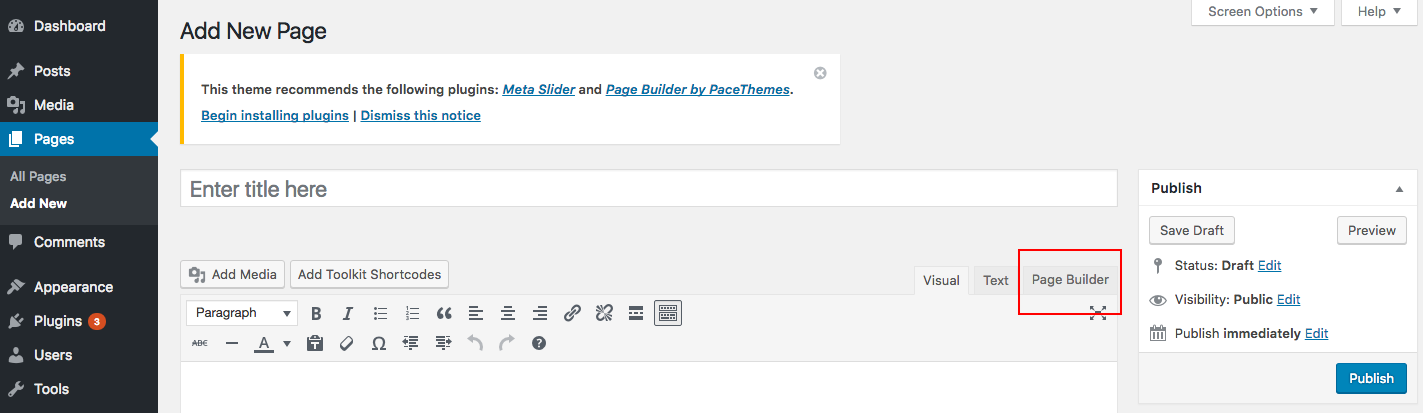
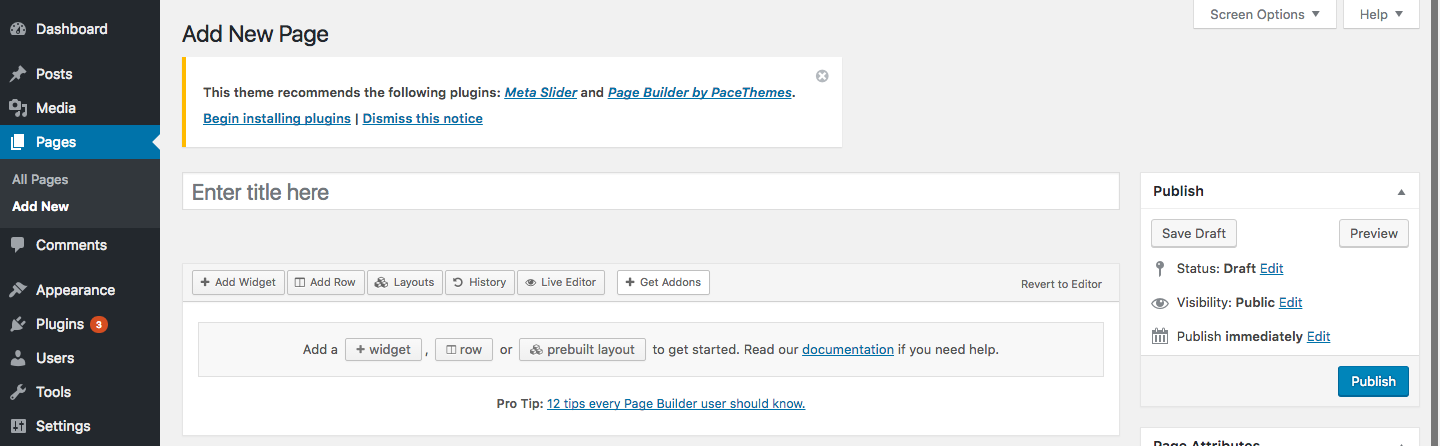
You will be presented with many options including “Add widget,” “Add row,” “Layouts,” “History,” and “Live editor.”
Adding Rows
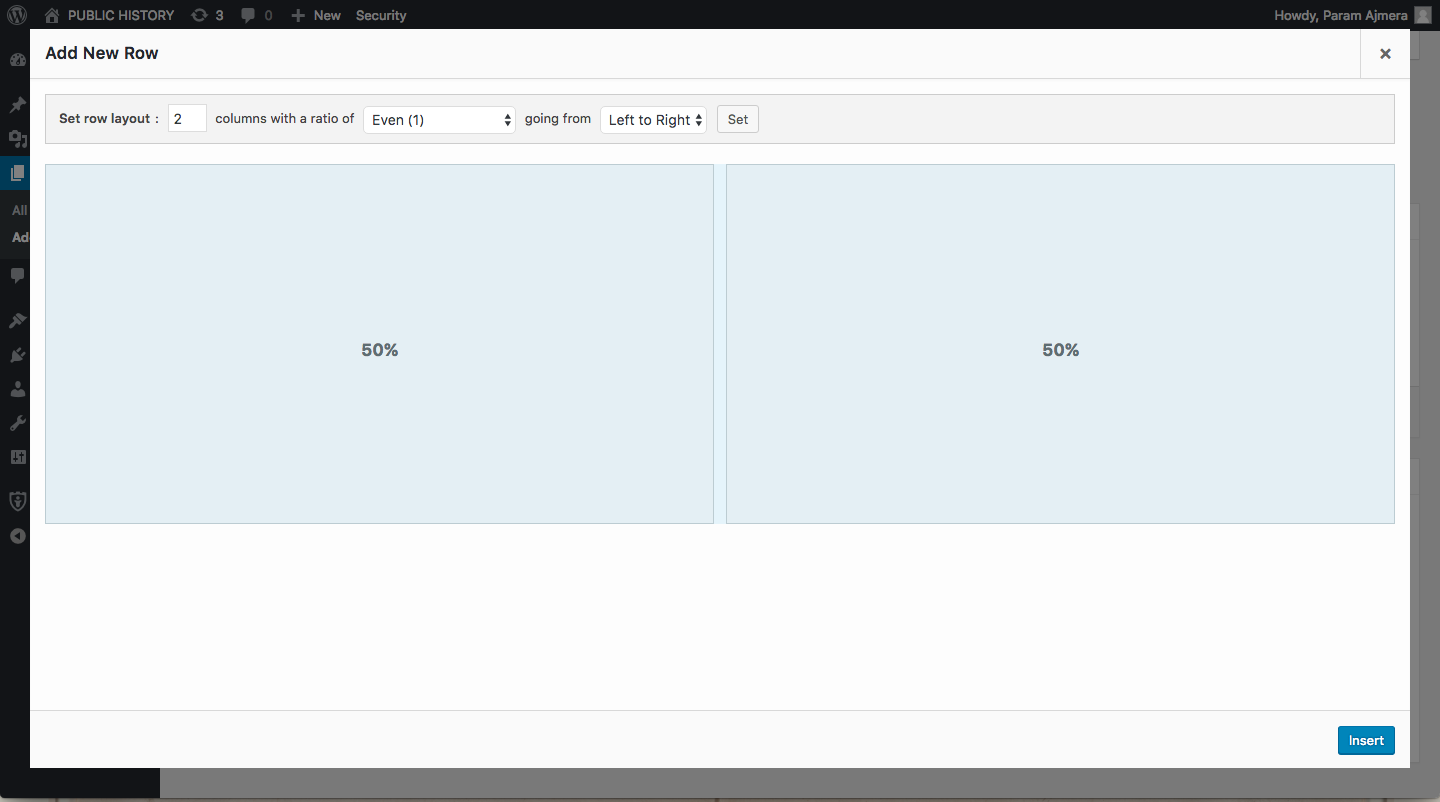
The “Add Row” option is second from the left on the Page Builder screen. This option allows you to divide the page/post into a number of different rows and columns of customizable sizes.
To “set row layout,” input the desired information into each editable space.
- The first box allows you to choose the number of columns that will appear in this row, with a maximum of 12.
- The second box is a drop-down menu of several ratio options. Changing this value will allow you to make some columns smaller than others.
- You can further adjust the ratios by clicking and dragging the bars between the columns, or by manually clicking on the percentages and entering the desired value.
- The third box allows you to choose whether the size should decrease from Left-to-Right or Right-to-Left. This will not change anything if you keep the default ratio of “Even (1).”
You can further customize the look of this row by using the Row Styles menu on the right side for more advanced options.
When you are satisfied with the layout for this row, select the “Insert” button in the bottom right of the screen to Add the Row to your page/post.
Editing and Deleting Rows
To Edit a Row that you have created, click the wrench icon in the upper-right-hand corner.
To Duplicate a Row, hover your cursor over the wrench icon. In that drop-down menu, click “Duplicate Row.”
To Delete a Row, hover over the wrench icon. In that drop-down menu, click “Delete Row,” and then click again on “Are you sure?” to confirm your action.
Additional Rows
To add additional rows, click “Add Row” again and repeat the process.
Reorder rows that you have created by clicking and dragging from the up-down arrow icon in the upper-right-hand-corner.
Adding Content
Select a particular row or cell by clicking on it. When selected, it will turn darker.
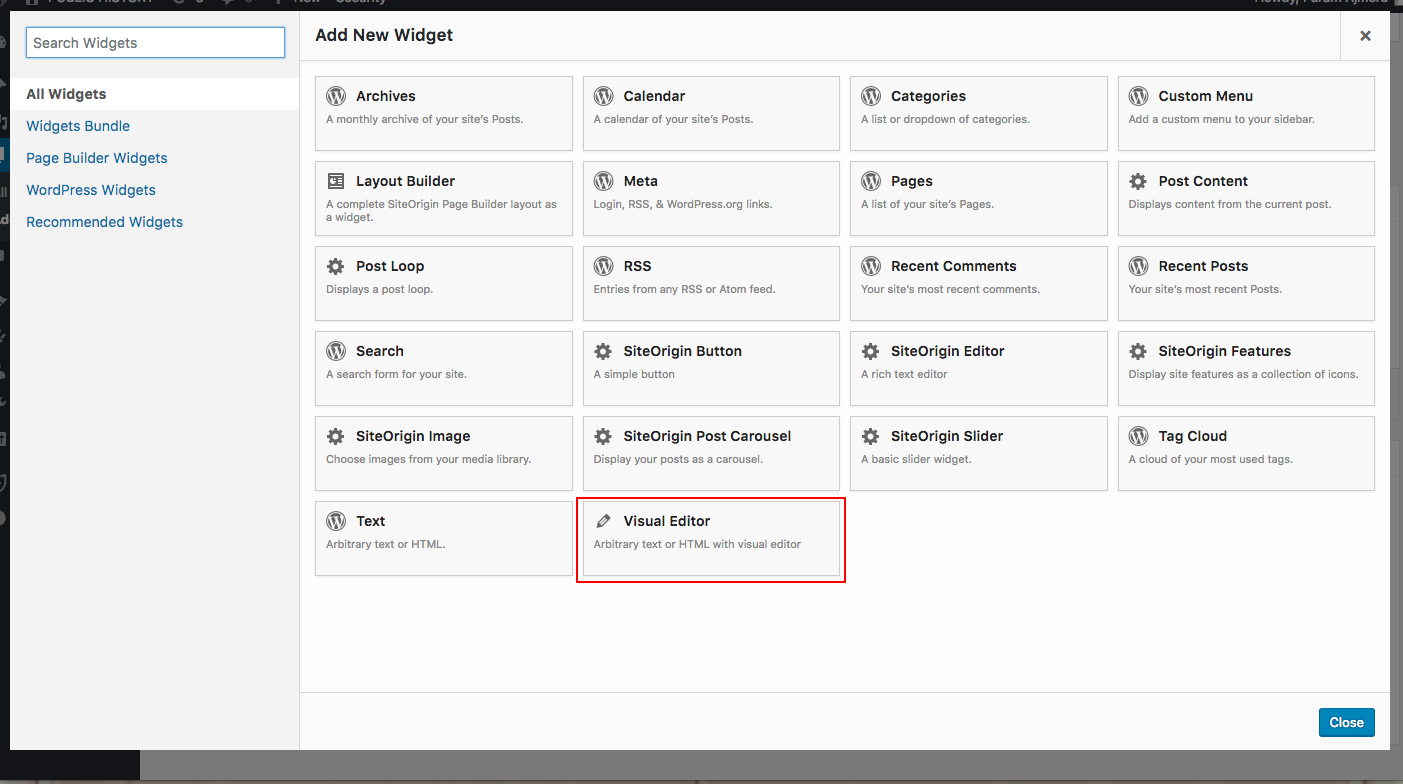
Then, select “Add Widget” on the far left to add content.
To add specific items from the DRS or the Digital Public Library of America (DPLA), scroll to the bottom of the menu and choose the “Visual Editor” widget. The Visual Editor will also allow you to input text and non-DRS/DPLA images.
To access the DRS or DPLA, hover your cursor over to the top right of the space inside your row or cell to make the “Edit” option appear.
Click the “Edit” button to enter the Visual Editor.
From there, click “Add Toolkit Shortcodes” to find and select your desired item. For more information on this process, go to the page titled “Using Shortcodes to Display your Images and Other Materials from the DRS.”
The “Layouts” tab allows you to “clone” the layout of individual Pages/Posts you have already created (see Duplicating Pages and Posts).
The “History” tab allows you to see all the changes that you have made to this Page/Post in chronological order.
The “Live Editor” tab allows you to see and make changes in your Page/Post from the perspective of an outside viewer who visits your website.
If you would like to clear your Page Builder content and return to the simpler editor, click “Revert to Editor” on the far right, then select “Yes.” You will lose your data if you do this, so be sure to create a backup for your page first if you do not want to lose your work.