Using Shortcodes to Display your Images and Other Materials from the DRS
CERES allows you to embed material directly from Northeastern's Digital Repository Service (DRS). This allows for digital archival storage of these materials to preserve your research over time.
Shortcodes
Shortcodes provide a friendly, clickable interface that allows you to select items from the DRS to display and arrange items in many different ways. You can embed pictures within a long text narrative, as well as create more visually stimulating exhibits such as a rotating carousel, map, timeline, or Pinterest-style gallery.
Shortcodes allow you to select between items uploaded to the DRS as part of your class assignment or items that are already present in a collection within the DRS.
Shortcodes can also allow you to choose items from the Digital Public Library of America’s (DPLA) repository, or items that you’ve uploaded locally to the WordPress media library alongside your DRS items (see "Adding Images and Other Media to the Media Library").
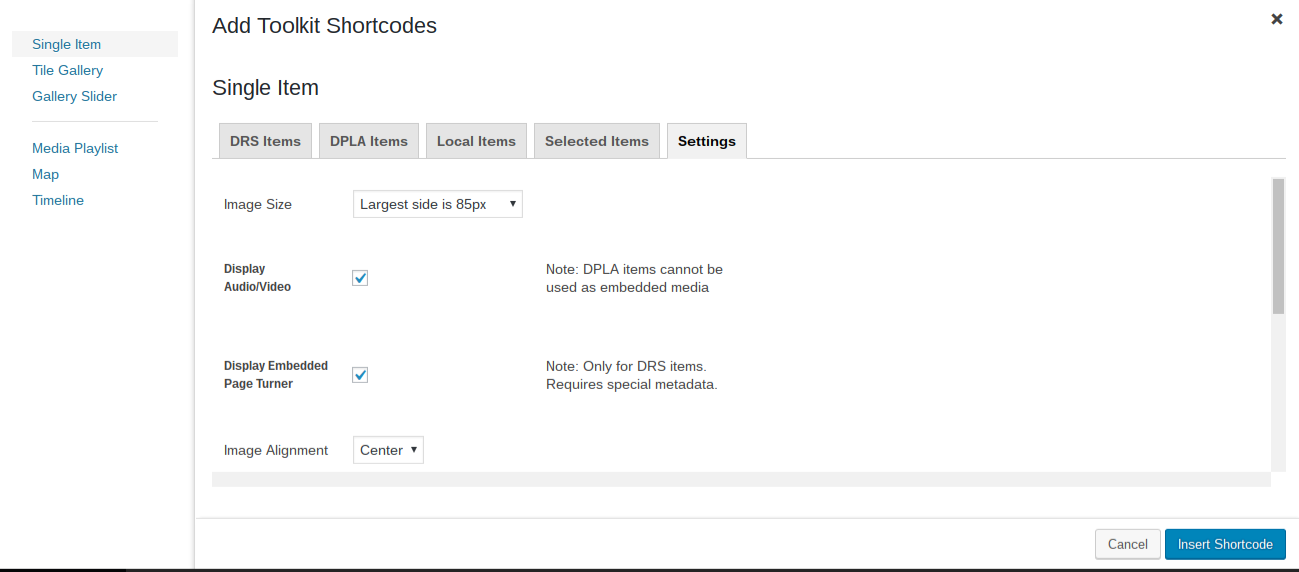
To embed your items, click the button that reads “Add Toolkit Shortcodes,” which is next to the “Add Media” button above the text box, then choose which method of embedding items that you would like to use.

- The “Single Item” option will add only one item at a time.
- The “Tile Gallery” option will arrange multiple items in tiles.
- The “Gallery Slider” option will create a playlist of multiple items that appear in the same row and change periodically.
- The “Media Playlist” option will add interactive items like video clips, audio clips, or documents.
- The “Maps” option will add display items encoded with associated locations.
- The “Timelines” option will add display items encoded with associated dates.

Utilizing the DRS Database
In the “DRS Items” tab, select the items you want to include.
Use the search button to help you find items more easily, using any metadata that would attached to the desired item. You may also click “Show filtering options” to filter your results.
You may also browse and search items from the DPLA’s repository in the “DPLA Items” tab, or add local items in the appropriate tab.
Note: If you add local items using the WordPress "Media Library," they will not behave the same way as other embedded items. Adding these local items using a Toolkit Shortcode, however, means that they will behave like your other items.

The “Selected items” tab will accumulate all the items you have selected. By clicking the “Settings” tab, you can choose what metadata you would like to display and make use of a few design options.
Click the “Insert shortcode” button when you are finished. Your shortcode has now been generated: it is the code bounded by brackets.

Shortcodes Explained
The Project IDs (PIDs) of DRS items displayed with your shortcode are listed, separated by commas, after the “id” attribute.
The PID that represents an item in the DRS takes the form of neu:xxxx. DPLA files are represented by dpla:xxxx, and local files display as wp:xxxx. In each, “xxxx” is a unique string of alphanumeric characters that varies in length.
The shortcode’s other attributes control the design options. Your selections in the point-and-click interface changes these options. This can include what size thumbnails render; whether captions appear, where, and with what contextual information; the style of a gallery; and whether a gallery that animates starts without clicking.
Modifying Shortcodes
Once you have generated a custom shortcode, you may double click on that shortcode to add additional items or modify aspects of the embedding method, using the point-and-click interface. Click “Insert Shortcode” again, and your changes will be reflected.
You may also alter the shortcode manually.
To add items to your shortcode you may find the PID associated with an item you want to add from your DRS set or collectionand add it to the list of PIDs under the “id” attribute.
The ID located at the end of the URL of the item’s page in the DRS
You may remove an item by deleting its PID from the shortcode.
The order of the PIDs in the list determines the order that they will be displayed in your exhibit.
As you explore the different options and become more familiar with the syntax of the shortcodes, you may directly modify the other attributes. These may include size, what metadata is displayed, and alignment and position of captions, among other things.
Building Your Exhibits
- Creating Pages and Posts
- Using Page Builder
- Duplicating Pages and Posts
- Search, Browse, and Collections
- Customizing Single Item Pages
- Using Shortcodes to Display your Images and Other Materials from the DRS
- Adding Images and Other Media to the Media Library
- Creating Exhibits with Shortcodes: Display Options for Single Items and Galleries
- Creating Exhibits with Shortcodes: Maps, Timelines, and Playlists