Global and Homepage Customizations
Global customizations refer to changes that will affect every page and/or post in your website. These include changes to fonts, color schemes, and the banner image.
Fonts - Sizes, Styles, Colors
The selection of fonts is closely linked to the size of the text that you choose in the Edit Page screen. The size of the text can be changed by selecting one of the options in the dropdown menu of the Edit Page screen.

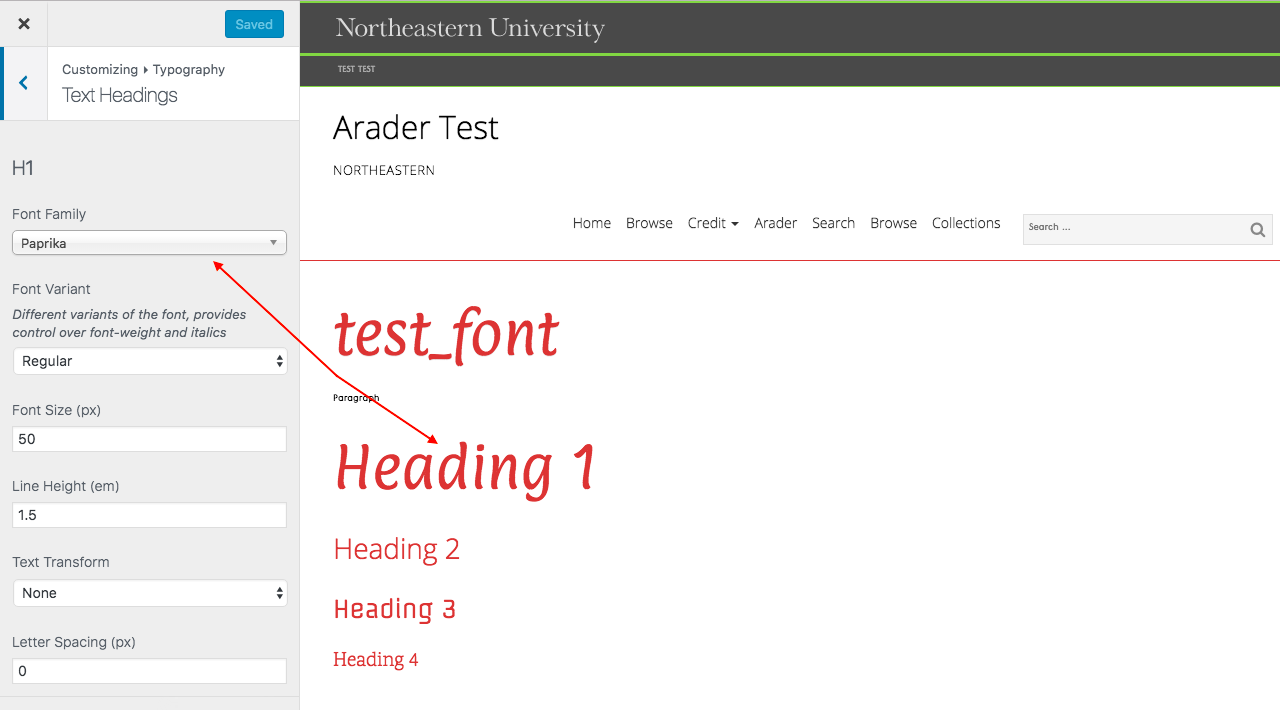
Once you have selected how big you want your text to appear, you can assign specific font styles and color to correspond to each font size. These are global changes because they will affect how the text is displayed on every page in your website, and so it is important to maintain consistency in the ways in which font sizes are used throughout the website. To assign a particular font style to a particular font size, go to Dashboard --> Appearance --> Customize --> Typography --> Text Headings, and then choose your font style. For changing your font style for text that is given the "Paragraph" size, go to Dashboard --> Appearance --> Customize --> Typography --> Global, and then choose your font style.
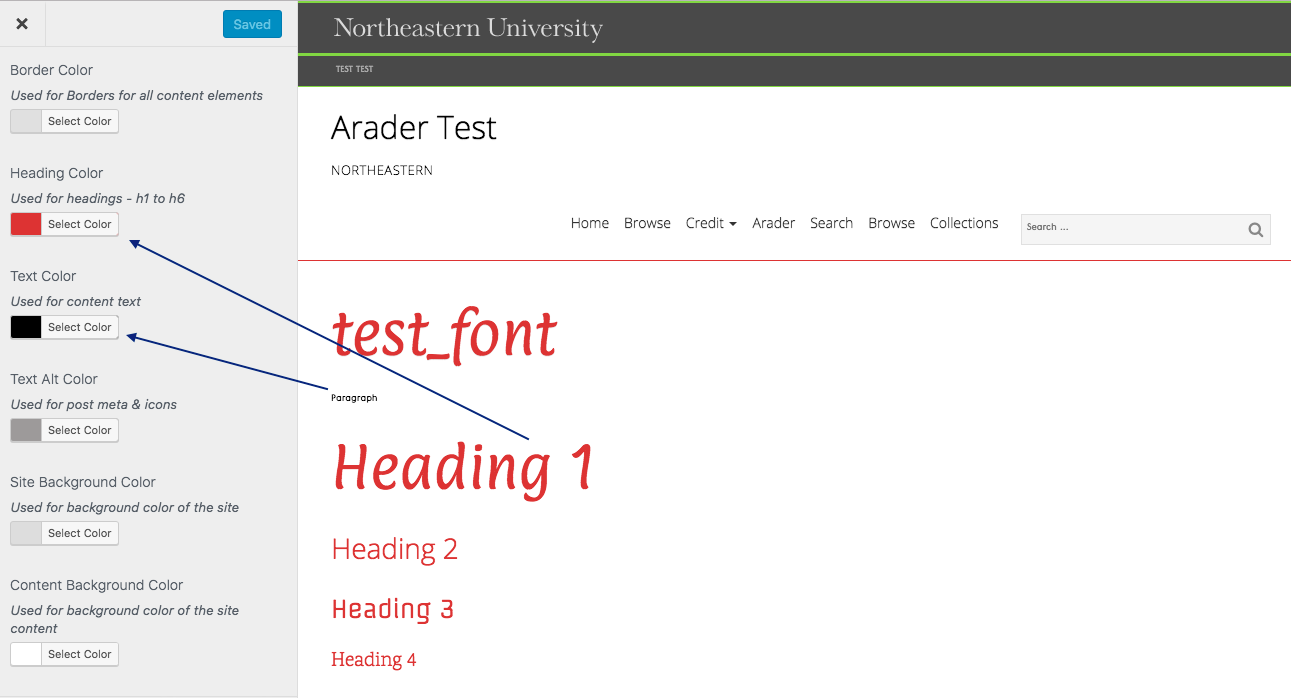
After assigning size and style, you can also associate a particular color to go with each font size. Like font style, font color is also a global change, and so if you assign the color red to Heading 1, then all the text in your website that is sized as Heading 1 will display as red. To assign a particular color to a particular font size, go to Dashboard --> Appearance --> Customize --> Color --> Global, and then choose your color for text (i.e. text that is given the "Paragraph" size) and headings.
Colors - Other Settings
WordPress gives you the functionality to change the colors associated with the header, main menu, title container, footer, galleries, panels, and sidebar. To change the color schemes associated with different aspects of your website, go to Dashboard --> Appearance --> Customize --> Colors and choose the aspect of your website that you want to edit.
Banner Image
Banner Images display on the Search, Browse, and Collections pages. These can be used to complement the visual aesthetics of your website. To choose a banner image, go to Dashboard --> Appearance --> Customize --> Background Images --> Global and then add your banner image in the Title Container field.

Homepage customizations refer to changes that will affect the design, layout, and content of the landing page of your website. This is the first page that a visitor will see when they visit your website. CERES provides a sample homepage with every install that includes a banner, three columns of text with links and buttons. All of these can be deleted and the homepage can be rebuilt using the Page Builder to reflect the particularities of your website.
To edit your homepage, go to Dashboard, then Pages, and then click on the page titled Home -- Front Page. From here you can edit the homepage like any other page in your website.
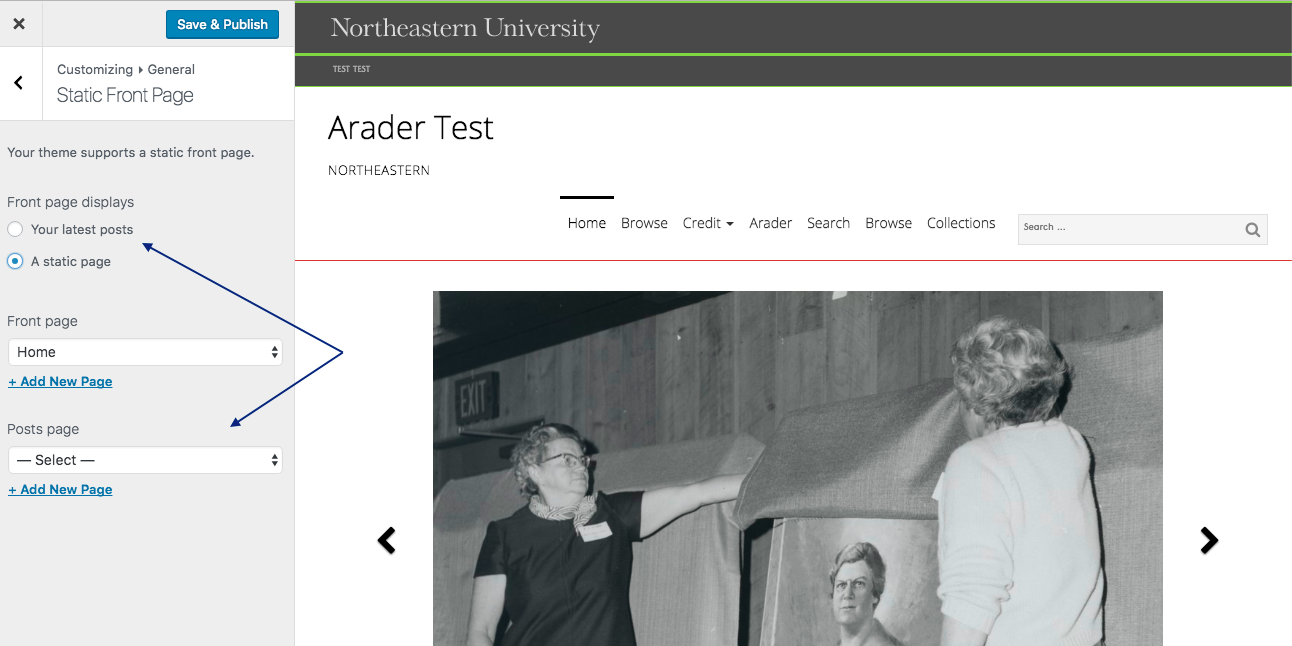
In addition to maintaining a static homepage, i.e. a homepage that doesn't change as content is added or removed from your website, CERES also gives you the option to display new blog posts on your homepage as they are added to your website. To change your homepage to automatically display new blog posts, go to Dashboard --> Appearance --> Customize --> General --> Static Front Page, and then select "your latest posts" as well as select your Posts page from the dropdown menu provided.